
Imagine you’re in a rush, looking for something quick, healthy, and delicious. The tuna melt wrap is here to save the day. It turns a simple seafood wrap into a tasty treat in just 10 minutes.
This tuna sandwich is more than just a fast meal. It’s packed with 18 grams of protein, keeping you full and focused. It’s perfect for busy people or anyone looking for a tasty lunch.
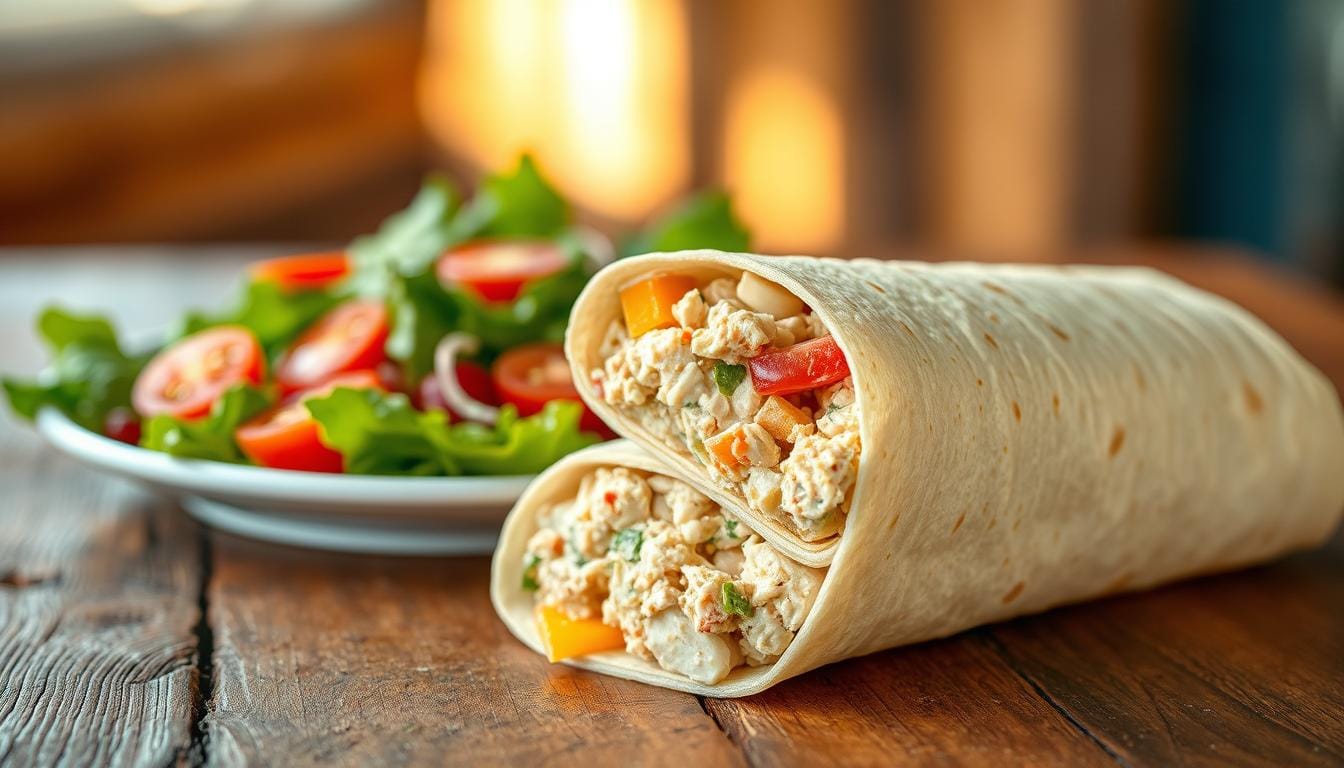
The technique of creating the ideal tuna melt wrap. It requires fresh ingredients, smart techniques, and a bit of creativity. Choosing the right tuna, wrap, and cheese is key to a meal that’s both healthy and tasty.
In this guide, we’ll show you how to make tuna melt wraps just like a restaurant. Get ready to make your lunchtime better with a seafood wrap that will become a favorite.
Table of Contents
Essential Ingredients for the Perfect Tuna Melt Wrap
Creating a great fish wrap starts with the right ingredients. Your tuna melt will stand out with quality parts that mix taste and health well.
Selecting Premium Tuna
For the best tuna experience, choose top-quality fish. Skipjack and Yellowfin tuna taste great and have less mercury. Look for brands like:
- Safe Catch Tuna
- Wild Planet Tuna
- Sustainably sourced options
Fresh Produce and Flavor Enhancers
Make your fish wrap amazing with fresh ingredients. Add these to boost flavor:
- 2 stalks of chopped celery
- 2 tablespoons minced parsley
- ½ small red onion
- 6 tablespoons mayonnaise
- 1 tablespoon Dijon mustard
- Fresh lemon juice
Cheese and Wrap Selections
Choose the right cheese and wrap to elevate your tuna melt. Try these combinations:
- 8 slices of cheddar or American cheese
- 4 burrito-sized tortillas
- Optional additions: hot sauce, sliced avocado
Pro tip: Try different cheeses and wraps to find your favorite!
Kitchen Tools and Equipment Needed
To make the perfect tuna melt wrap, you need some basic kitchen tools. This easy recipe requires a few important tools for tasty results every time.
Essential Cooking Equipment
- Mixing bowl for preparing tuna salad
- Cutting board for chopping ingredients
- Sharp kitchen knife
- Measuring spoons and cups
- Skillet or grill pan
Your skillet is key for a crispy tuna melt wrap. A non-stick skillet is best for even heating and easy cleaning.
Optional Helpful Tools
- Food processor for finely chopping ingredients
- Panini press for uniform grilling
- Spatula for flipping the wrap
- Kitchen tongs
| Tool | Purpose | Recommended Type |
|---|---|---|
| Skillet | Heating and crisping wrap | Non-stick, 10-inch |
| Mixing Bowl | Preparing tuna salad | Medium ceramic or stainless steel |
| Knife | Ingredient preparation | Sharp chef’s knife |
Pro tip: Have all your tools ready before you start. It makes making a healthy wrap easy and fun!
Preparing the Tuna Salad Base
Making a tasty tuna salad wrap begins with a great base. Your tuna melt wrap recipes will be amazing when you mix the ingredients right. You’ll get the perfect consistency.
Mixing the Core Ingredients
Start by getting these key ingredients:
- 10 ounces of skipjack or albacore tuna (drained)
- 1/3 cup Greek yogurt
- 1/2 teaspoon Dijon mustard
- 1/2 medium apple, finely chopped
- 1/2 cup corn
- 1/2 cup chopped pickles
Adding Flavor Enhancers
Make your tuna salad wrap even better with these ingredients:
- 2 teaspoons fresh lemon juice
- 1/2 teaspoon garlic powder
- 1/2 teaspoon salt
- 1/8 teaspoon black pepper
- 1/4 cup toasted chopped walnuts
Achieving the Right Consistency
The secret to a great tuna salad wrap is the right texture. Mix gently to keep the tuna flaky. Aim for a creamy but firm mix that sticks together well.
Pro tip: Let your tuna salad sit for 10-15 minutes before wrapping. This lets the flavors blend and intensify.
| Ingredient | Quantity | Purpose |
|---|---|---|
| Tuna | 10 ounces | Protein base |
| Greek Yogurt | 1/3 cup | Creaminess |
| Lemon Juice | 2 teaspoons | Flavor brightness |
| Chopped Nuts | 1/4 cup | Texture and crunch |
Remember, a great tuna salad wrap is all about balance and personal preference. Don’t be afraid to experiment with your favorite ingredients!
Mastering the Tuna Melt Wrap Assembly

Making a perfect simple tuna melt wrap needs precision and care. The success of your wrap depends on how you place ingredients and fold them. You want a wrap that’s healthy and full of flavor.
Here are the key steps for making a professional-looking wrap:
- Warm your burrito-sized wrap for 10-15 seconds to make it easier to fold
- Spread a thin layer of cheese in the center of the wrap
- Add your tuna mixture, leaving 2-inch margins on the sides
- Layer in more ingredients like diced celery or chopped pickles
Folding the wrap right is key to keeping everything inside. Start by:
- Folding the bottom edge up tightly
- Tucking in the side margins
- Rolling from bottom to top with firm pressure
You can make your simple tuna melt wrap your own by trying different things. Here are some ideas:
| Ingredient | Variation Options |
|---|---|
| Cheese | Cheddar, Jack, Provolone |
| Vegetables | Celery, Fennel, Pickles |
| Wrap Type | Flour, Whole Wheat, Spinach |
Pro tip: The more you practice, the better you’ll get. Your first few tries might not turn out right, but you’ll soon make wraps that look like they came from a restaurant.
Cooking Methods and Techniques
Discovering the perfect cooking method can make your simple tuna melt in oven amazing. Different techniques offer unique advantages. They help you create a delicious wrap that fits your kitchen and taste.
Stovetop Grilling Method
The stovetop method gives a crispy exterior and golden-brown finish. Here’s how to cook your tuna melt perfectly:
- Heat a skillet on medium heat
- Add a light coating of olive oil
- Place wrap seam-side down
- Cook for 3-4 minutes until golden
- Flip and cook additional 2-3 minutes
Oven Baking Instructions
When considering how long to cook tuna melt in oven, follow these steps for a foolproof result:
- Preheat oven to 375°F
- Place wrapped tuna melt on a baking sheet
- Bake for 8-10 minutes
- Check for golden-brown cheese and crispy edges
Air Fryer Alternative
For a quick and efficient cooking method, the air fryer offers convenience:
- Preheat the air fryer to 380°F
- Cook tuna melt for 3-4 minutes
- Flip halfway through cooking
- Ensure the cheese is melted and the wrap is crispy
Cooking Time Comparison
| Cooking Method | Temperature | Cooking Time |
|---|---|---|
| Stovetop | Medium Heat | 5-7 minutes |
| Oven | 375°F | 8-10 minutes |
| Air Fryer | 380°F | 3-4 minutes |
Pro tip: Always watch your tuna melt closely. This prevents burning and ensures perfect golden-brown perfection!
Creative Variations of Tuna Melt Wrap
Try new things with your tuna melt by adding exciting twists. These changes can make your meal more interesting or fit your dietary needs. You’ll find inspiration for your next cooking project in these creative ideas.
Protein-Packed Variations
- Spicy Kick Tuna Melt: Add red pepper flakes and Pepper Jack cheese for a zesty twist
- High-Protein Mediterranean Wrap: Incorporate Greek yogurt and extra protein sources
- Deluxe Protein Wrap: Include eggs and avocado for added nutrition
When making your tuna melt in the oven, think about these protein-rich options. They boost both taste and health benefits.
Dietary-Friendly Options
| Variation | Key Ingredients | Protein Content |
|---|---|---|
| Vegan Wrap | Plant-based tuna substitute, cashew cheese | 15-20g |
| Low-Carb Lettuce Wrap | Butter lettuce, tuna salad, Greek yogurt | 25-30g |
| BBQ Chicken Wrap | Shredded chicken, BBQ sauce, cheddar | 30-35g |
Pro tip: Try different cheeses like Swiss, Provolone, or Muenster for unique tastes. Summer tomatoes can also add freshness to your tuna melt wrap.
Cooking Techniques
Each variation might need a slight cooking method tweak. For a crispy top, use the tuna melt oven foil method at 300°F. Or, try air frying for 5 minutes. The goal is to keep it moist while getting a golden, melted cheese.
Tips for Making Restaurant-Quality Wraps
To make a tuna melt wrap like a pro, it’s not just about the recipe. It’s about mastering certain techniques. These techniques will take your grilled tuna wrap from home-cooked to restaurant-quality.
Texture Balance Techniques
Getting the right texture in your tuna melt wrap is key. It’s all about mixing the right elements:
- Crisp outside and soft inside
- Tuna mix should be just right, not too dry or wet
- Choose cheeses that melt well, like mozzarella or sharp cheddar
Temperature Control Secrets
Controlling the temperature is crucial for a great tuna melt wrap. Here are some pro tips:
- Heat your grill pan or skillet to medium-high
- Cook each side for 2-3 minutes for golden-brown marks
- Keep the internal temperature at 165°F for safety
Presentation Techniques
How your wrap looks is just as important as how it tastes. Chefs know that presentation can make a big difference:
- Cut the wrap diagonally with a sharp knife
- Add a small garnish of fresh herbs
- Serve right away to keep it hot and crispy
By using these expert tips, you can turn your homemade tuna melt wrap into a gourmet dish. It will be just as good as what you find in restaurants.
Common Mistakes to Avoid

Making the perfect lunch wrap needs skill and care. Many people make simple mistakes that can ruin a tasty fish wrap. Knowing these mistakes helps you make a healthy wrap that’s as good as a restaurant’s.
- Moisture Management: The tuna mixture’s consistency is key. If it’s too dry, add a bit of fresh lemon juice to add moisture and flavor.
- Overfilling Hazards: Don’t overdo it with too many ingredients. Too much can make wrapping hard and might break your wrap.
- Heating Challenges: Wrong heating can leave cheese unmelted or wraps soggy.
Getting ready is important for your tuna melt wrap. Make sure you have a clean, big space to wrap. Bread for open-faced sandwiches should be 1 inch thick, and 1/2 inch for closed ones.
Temperature is key for the perfect wrap. When broiling, place your rack about 6 inches from the heat. For melting cheese, broil for 1 minute, then 3 more in the oven if needed.
Pro tip: for a great tuna mix, mash it until there are no flakes. This makes your wrap smooth and top-notch.
| Common Mistake | Solution |
|---|---|
| Dry Tuna Mixture | Add lemon juice or extra mayonnaise |
| Uneven Heating | Use the broiler or adjust the oven rack position |
| Overfilling | Moderate ingredient quantity |
Avoiding these mistakes turns your homemade lunch wrap into a tasty and healthy treat.
Nutritional Benefits and Health Considerations
Making a tuna melt wrap is not just tasty—it’s also full of good stuff. It has protein, carbs, and fats that are good for your heart.
Tuna is a top-notch protein source, with over 40 grams in a 172-gram can. This wrap is packed with nutrients:
- Rich in Omega-3 fatty acids
- Supports heart health
- Boosts metabolism
- Provides essential vitamins and minerals
Now, let’s look at what’s in your tuna melt wrap:
| Nutrient | Percentage of Daily Value |
|---|---|
| Vitamin B6 | 22% |
| Vitamin D | 17% |
| Selenium | 205% |
| Phosphorus | 30% |
Mercury Awareness: Tuna is great, but watch how much you eat. The FDA says to eat light tuna less than three times a week. You should only eat albacore tuna once a week.
Using whole wheat wraps and Greek yogurt makes your wrap even better. Greek yogurt has probiotics for your gut, and whole wheat gives you energy that lasts.
Your tuna melt wrap is more than just food. It’s a smart choice for your health.
Conclusion
Making the perfect tuna melt wrap is more than just cooking—it’s a fun adventure. It combines good food, taste, and ease. You’ll learn to make a quick, healthy meal that you’ll love.
The tuna melt wrap is a great choice for a meal. It’s full of protein and can be made to fit your diet. You can make it healthier by using Greek yogurt instead of mayo.
Cooking is all about trying new things. Your tuna melt wrap can change as you get better. Try different spices, veggies, and cooking methods to make it just right.
Whether you grill it on the stovetop or use an air fryer, you can get it crispy and warm. Enjoy the process of making this tasty, healthy meal.